Getting Started 3: Orchestration
Now that you've built and tested your DataNodes locally, it's time to orchestrate them on the Main Sequence Platform. This involves scheduling your data pipelines to run automatically or on demand.
1) Update Your Environment
Before scheduling anything, make sure your environment is consistent and your latest changes are committed.
- Activate your virtual environment (if not already active):
Windows PowerShell:
.\.venv\Scripts\Activate
source .venv/bin/activate
- Compile dependencies from your declared deps into
requirements.txt(most common flow):
uv pip compile pyproject.toml --universal -o requirements.txt
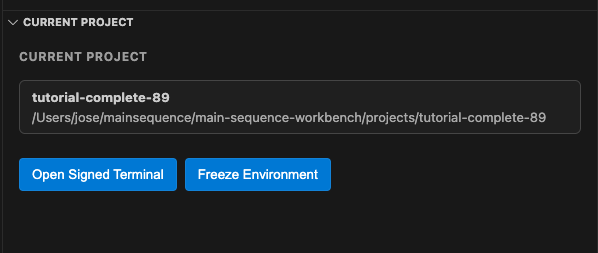
**Note** you can do this by clicking "Compile/Freeze Environment" button in the current project panel in the vs code extension
- Commit your changes:
git add -A        # stages new, modified, and deleted files
git commit -m "Tutorial files"
- Push to the repository.
Because this is a private, security‑backed repo behind the Main Sequence Platform, you'll need a signed terminal that loads the correct cryptographic key.
Open a signed terminal via the CLI:
mainsequence project open-signed-terminal [PROJECT_ID]
[PROJECT_ID] with your actual project ID (e.g., 60).
Then push your changes:
git push
2) Scheduling Jobs
You can run jobs manually or automatically on a schedule.
2.1 Manual Run
-
Open your Tutorial Project:
https://main-sequence.app/projects/?search=tutorial -
In the file browser, navigate to the project. It should look similar to:

- Click the scripts folder and select Create Job + on any of the launcher scripts. Name it, for example, Random Number Launcher — Manual Job.

- After creation, the job will appear under the Jobs tab. Because it's not scheduled, nothing has run yet. Click Run to execute it manually.
You'll see a confirmation toast in the top‑right corner:

- Click the job to view its Job Runs. Wait for the run to complete to see the results.

Frozen Jobs with Images
One important concept in building strong systems is being able to guarantee that they will run even when we make modifications to our code. To ensure this, we have included in each job creation the possibility of freezing the state of our project in a Docker image and using this image to run that job—or any other job. This allows us to guarantee that the job will run the same way every time, no matter what changes we make to our repository or dependencies.
All your images will be stored at the project level in the tab Images.
2.2 Automatic Schedule
As projects and workflows grow, you'll usually want automation described as code. You can define jobs and schedules within your project repo.
Create a file named project_configuration.yaml at the repository(your project) root.
Windows path example: C:\Users\<YourName>\mainsequence\<YourOrganization>\projects\tutorial-project\project_configuration.yaml
macOS/Linux path example: /home/<YourName>/mainsequence/<YourOrganization>/projects/tutorial-project/project_configuration.yaml
Add the following content to the project_configuration.yaml to schedule the simulated_prices_launcher.py to run daily at midnight:
name: "Tutorial job Configuration"
jobs:
  - name: "Simulated Prices"
    resource:
      script:
        path: "scripts/simulated_prices_launcher.py"
    schedule:
      type: "crontab"
      expression: "0 0 * * *"
Note: In the YAML file, always use forward slashes (/) for the script path, even on Windows. The platform will handle path conversion automatically.
Commit and push this file with a signed terminal as you did before.
mainsequence project open-signed-terminal [PROJECT_ID]
[PROJECT_ID] with your actual project ID (e.g., 60).
Than in new terminal window that opens, run:
git add project_configuration.yaml
git commit -m "Add automated job schedule"
git push
The platform will detect it and create the scheduled job automatically:
